Printing Excel Gridlines: A Quick Guide. In the world of Excel spreadsheets, where rows and columns intersect, forming cells, a vast grid is created. Oddly enough, this grid doesn’t appear by default when you print. However, in a brief video tutorial, I’ll guide you through tweaking that setting effortlessly.
How to Printing Excel Gridlines (Effortlessly)
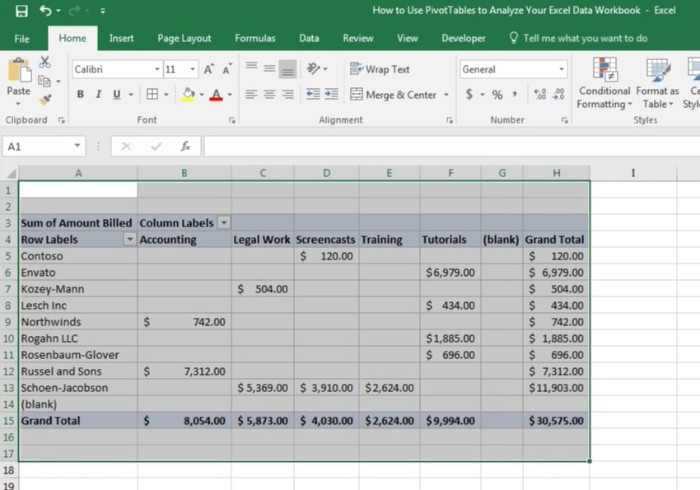
- Select the Desired Print Area in Excel Before printing Excel anything in Excel, my go-to step is always highlighting what I intend to include on the pages. A simple click-and-drag action over my selection does the trick.
- Customize Your Excel Print Settings Navigate to File > Print Menu. In the Settings dropdown, switch to ‘Print Selection’ to ensure only the highlighted area gets printed. You might want to fine-tune settings like changing to Landscape Orientation.

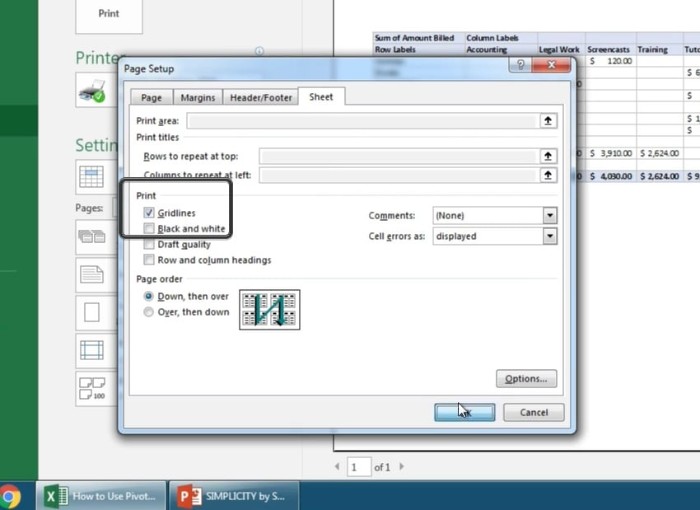
- Integrate Gridlines into Your Excel Print Settings Next, head to Page Setup and click on the Sheet tab, housing additional settings. Tick the Gridlines box and click OK.
- Witness Excel Printing With Gridlines Now, on the Printing Excel Preview pane, behold the gridlines decorating your content. These lines will be part of your printed document or the PDF you create.

Closing Touches! Adding gridlines to your printouts can significantly enhance the readability of your Excel data, simplifying its review process. Fortunately, activating this feature is a breeze.
Explore Envato Tuts+ for More Excel Mastery! Envato Tuts+ offers extensive Excel tutorials to enhance your data manipulation skills within spreadsheets. Dive into our quick-start ’60 Seconds’ Excel video series to swiftly grasp various Excel tools. Here are a few tutorials to get you started: [Links to recommended Excel tutorials]