
Mastering Excel’s Goal Seek Function. Delve into the world of Microsoft Excel’s Goal Seek function with our comprehensive guide tailored for Excel 2016.
The Goal Seek function serves as a powerful tool for What-If analysis, allowing users to achieve a desired output by manipulating a value in one cell and observing the corresponding changes in a dependent variable.
Let’s demystify this process with a practical example.
Mastering Excel’s Goal Seek Function
Consider a spreadsheet with two columns:
- Students’ names
- Their respective scores

To find the average score, the formula =AVERAGE(B2:B10) is employed.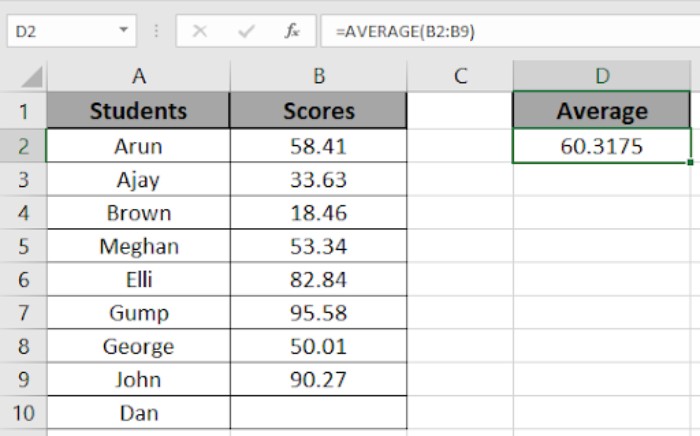
However, there’s a missing piece – Dan’s score. To fill in this gap, Goal Seek comes to the rescue.
Here’s a step-by-step breakdown:
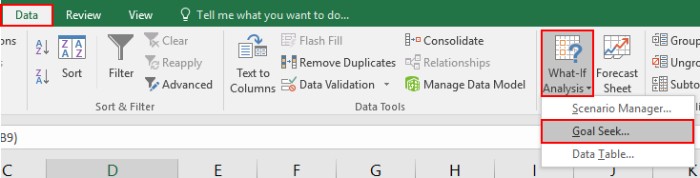
- Set the Stage:
- Navigate to Data > What-if-Analysis > Goal Seek.
- Navigate to Data > What-if-Analysis > Goal Seek.
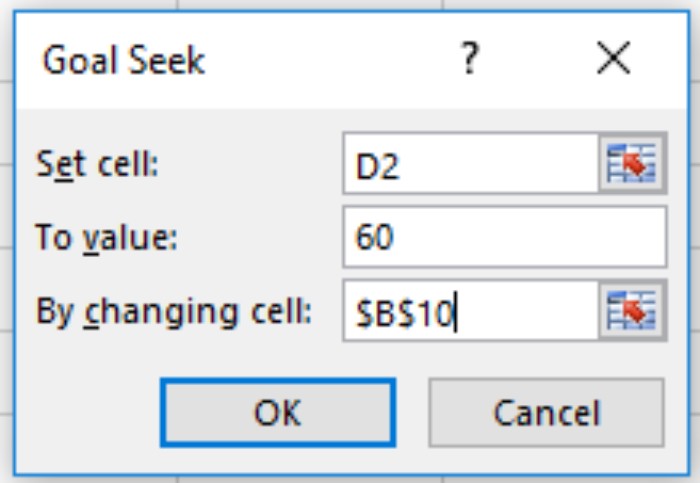
- Initiate Goal Seek:
- The Goal Seek dialog box materializes, resembling the snapshot below.
- The Goal Seek dialog box materializes, resembling the snapshot below.
- Configure the Variables:
- Set Cell: Fix the cell containing the average value, denoted as D2.
- To Value: Specify the target average, e.g., 60.
- By Changing Cell: Identify Dan’s score cell, which is B10.

- Execute the Command:
- Press OK, and witness Dan’s score materializing magically.
The Goal Seek function aptly discovers a solution and provides a Goal Seek Status for your reference.
Mastering Excel’s Goal Seek Function. Congratulations! You’ve now mastered the Goal Seek function in Excel 2016. It’s worth noting that this technique seamlessly applies to Excel 2010 and 2013 as well. For more insights and articles on Goal Seek, explore additional resources here. Should you have any queries, feel free to share them in the comment box below – we’re here to assist you on your Excel journey.


