
Inserting Timestamps in Excel: Which Method Works Best?. Back when I worked at a tech company, I often served as the go-to person for Excel help. One day, a reception coordinator approached me and asked:
“What’s the best way to insert a timestamps in Excel?”
And that’s when it clicked. Timestamps, commonly used to mark task completion with both date and time, are a staple in Excel. But which method stands out as the most efficient?
Let’s explore different ways to create timestamps in Excel and determine the optimal approach.
Inserting Timestamps in Excel: Which Method Works Best?
Using Keyboard Shortcuts for Timestamps
This method employs two shortcuts to insert both date and time consecutively:
First, select the cell where the timestamp is needed.
Use the shortcut Control + : to insert the current date (according to your system) into the cell.
Then, while the cell is still in edit mode, press Control + Shift + : to add the current time.
Finalize the entry by hitting Enter.
Pros:
Saves time and reduces the number of cells required.
Automatically selects the right format for displaying both date and time.
Cons:
Produces a static timestamp; to update it, you’ll need to re-enter.
Requires two different shortcut keys for entry.
Inserting Timestamps with the NOW Function
This dynamic method uses the NOW function to return the current date and time according to your system’s settings.
Pros:
Dynamic functionality.
Compatible with an IF function for conditional timestamp entry based on cell values.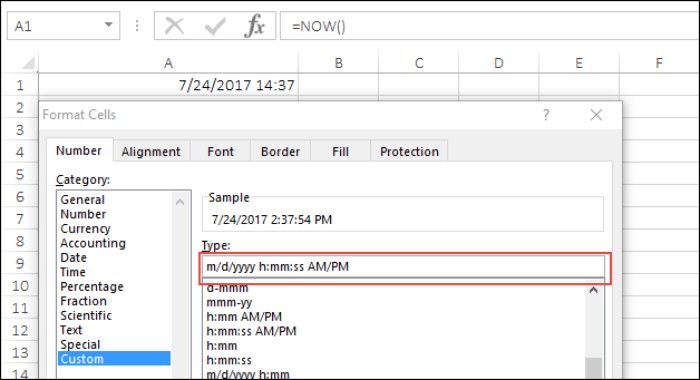
Cons:
As NOW is volatile, changes in your worksheet prompt updates to the timestamp.
Converting formulas into values manually may be necessary for value-centric use.
Your input matters! Share your thoughts in the comments, and feel free to pass along this tip to your friends.


