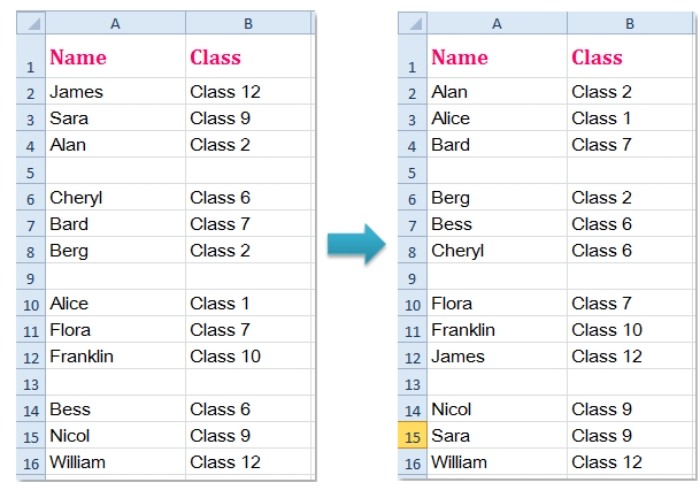
In Excel, hidden rows are not considered during sorting. To maintain the integrity of the sorting process, we can first hide the blank rows and then proceed with sorting the data. Here are the steps you can follow:
Sort data but keep blank rows in Excel
1. Choose your data list and navigate to the “Home” tab. Click on “Find & Select” and then select “Go To Special,” as shown in the screenshot below:
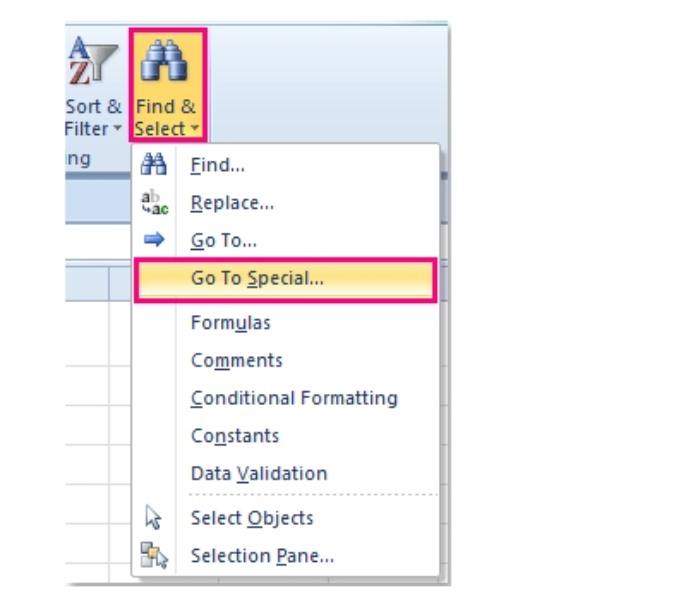
How to sort data but keep blank rows in Excel
2. In the “Go To Special” dialog, under the “Select” section, opt for “Blanks,” as depicted in the screenshot:
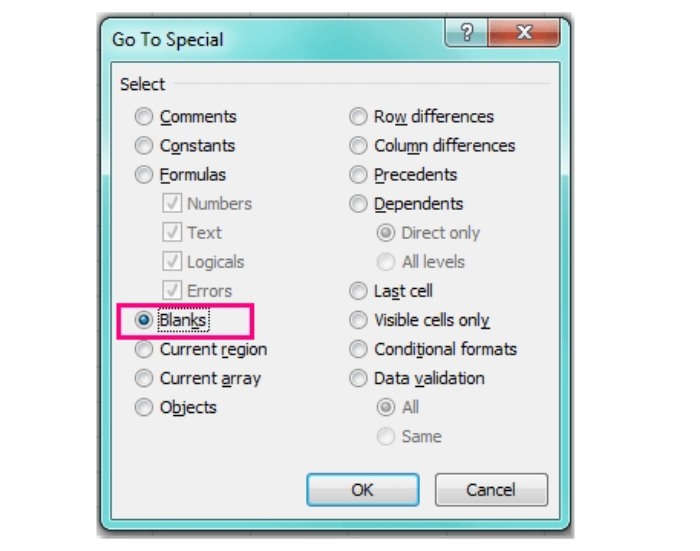
3. Once you have selected all the blank cells, hide the blank rows by pressing the “Ctrl + 9” keys. You will notice the blank rows disappearing, as shown in the screenshots below:

4. Next, select your data list and click on “Data” > “Sort.” A “Sort” dialog will appear. Choose the column by which you want to sort the data, and select the desired sorting order, as demonstrated in the following screenshot:
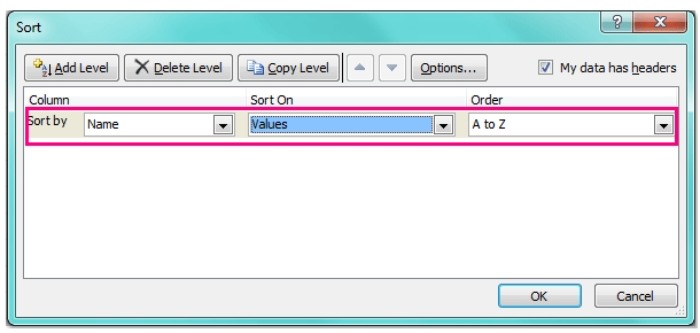
5. Click “OK” to execute the sorting based on the selected column.

6. Once the data is sorted, you can restore the hidden rows by pressing “Shift + Ctrl + 9” keys simultaneously. This action will reveal the hidden blank rows while preserving the sorted data, as depicted in the provided screenshots.

By following these steps, you can ensure that your data remains organized and that the blank rows are retained throughout the sorting process. This method helps maintain the structural integrity of your data while allowing for a seamless and efficient sorting experience in Excel. Using these techniques, you can efficiently handle and manage your data sets with precision and accuracy, ensuring that your work is organized and easily comprehensible.


