You can make a Word document read-only using various methods, depending on your specific needs. Here are three ways to achieve this:
Make a Word Document Read-Only Before Opening:
- Open the folder containing the Word document.
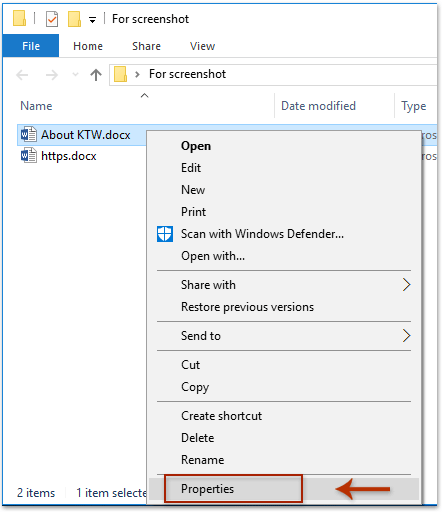
- Right-click on the Word document and select “Properties.”
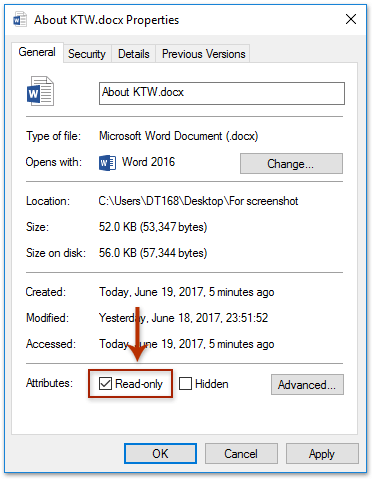
- In the Properties dialog box, check the “Read-only” option and click “OK.”

Now, the Word document will be opened in read-only mode.
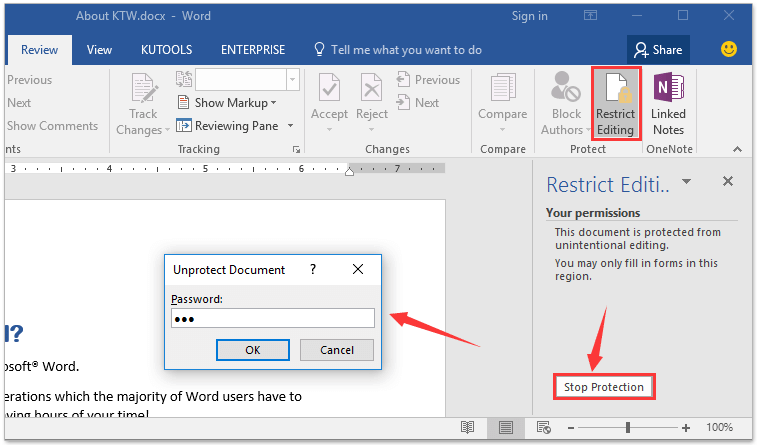
Make an Opening Word Document Read-Only by Using the Restrict Editing Feature:
- Open the Word document you want to make read-only.

- Go to the “Review” tab and click on “Restrict Editing” to open the Restrict Editing pane.
- In the Restrict Editing pane, check “Allow only this type of editing in the document” and choose “Filling in forms.”
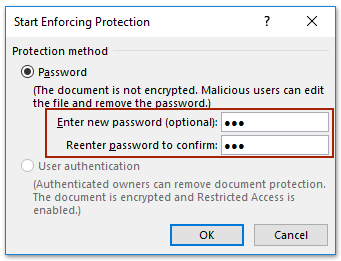
- Click “Yes, Start Enforcing Protection.”
- Set a password in the “Start Enforcing Protection” dialog box and click “OK.”
The document is now read-only, and users are prevented from editing it.
To turn off the read-only view, go to “Review,” click “Restrict Editing,” and then click “Stop Protection.”
Make an Opening Word Document Read-Only Using Save As Tools:
- Click on “File,” select “Save As,” and choose “Browse.”
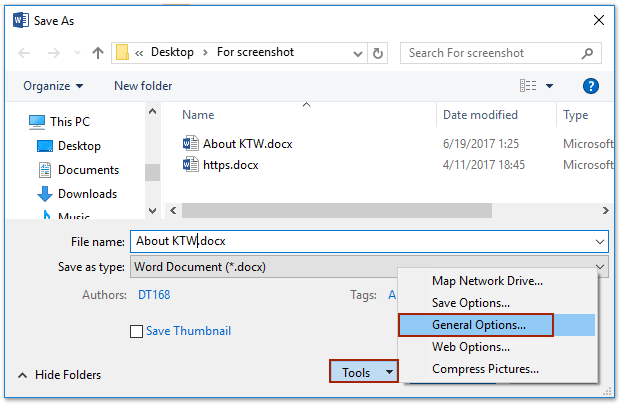
- In the Save As dialog box, click on “Tools” and then select “General Options.”

- In the General Options dialog box, check the “Read-only recommended” option and click “OK.”
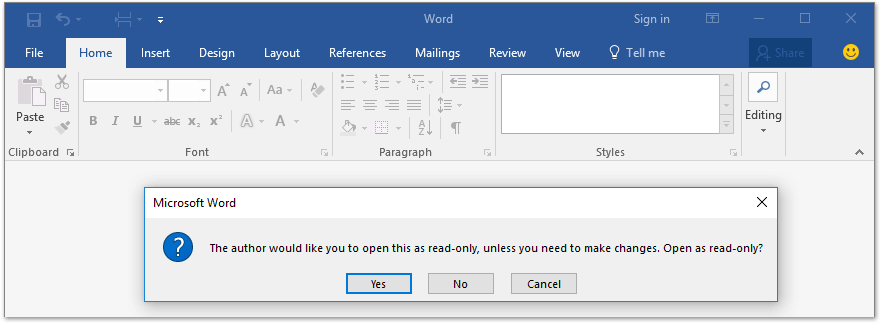
- Click “Save” without specifying a destination folder and file name.
How to make a Word document read only
When you open the Word document later, a dialog box will notify you that the document is read-only.
Choose the method that best suits your requirements.


