In a Word document, coloring individual table cells is a common task. However, if you wish to apply a gradient fill to your table, there’s a creative method using Text Boxes. Here’s how you can achieve this in Word.
Applying Gradient Fill to Table Cells Using Text Box Insertion:
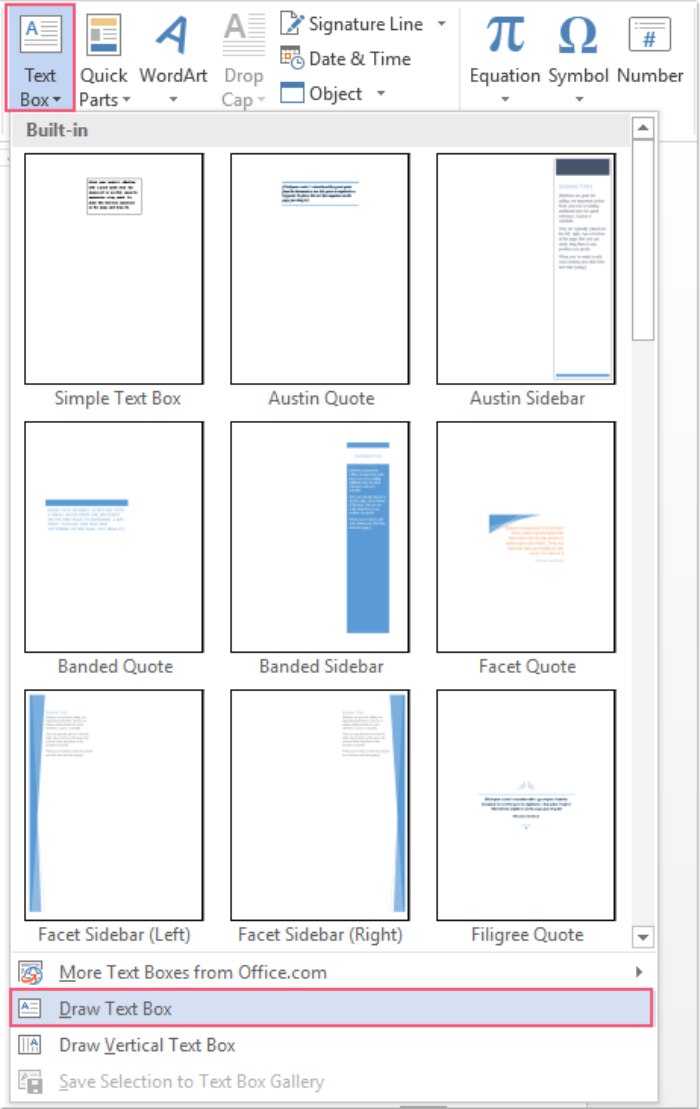
- Insert a Text Box:
- Click on “Insert” > “Text Box” > “Draw Text Box.” See the screenshot:
How to Apply Gradient Fill to Table Cells in Word
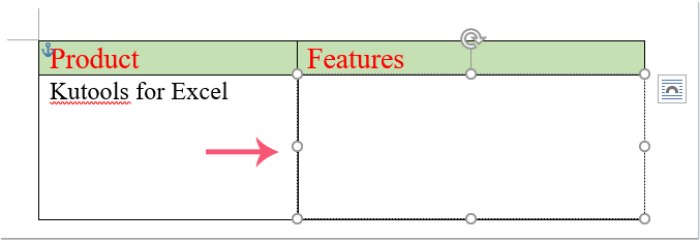
- Draw a Text Box:
- Draw a text box with similar dimensions to the cell in your table. See the screenshot:
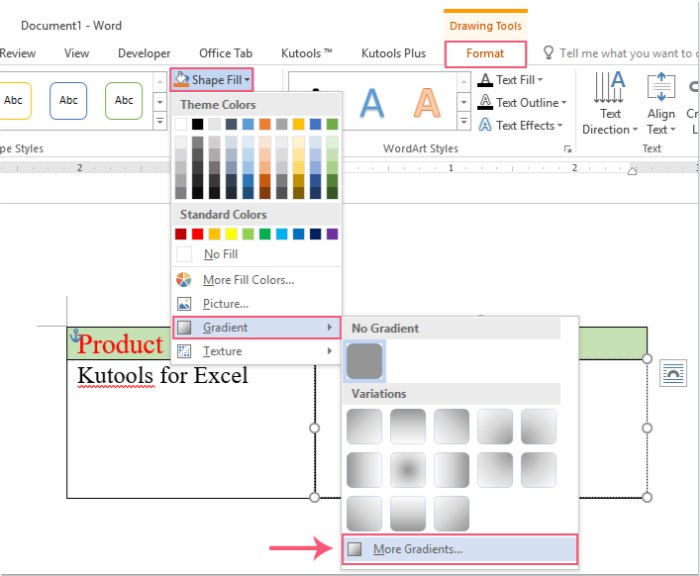
- Apply Gradient Fill to Text Box:
- Click on the text box, then select “Format” > “Shape Fill” > “Gradient” > “More Gradients” in the “Drawing Tools” tab. See the screenshot:
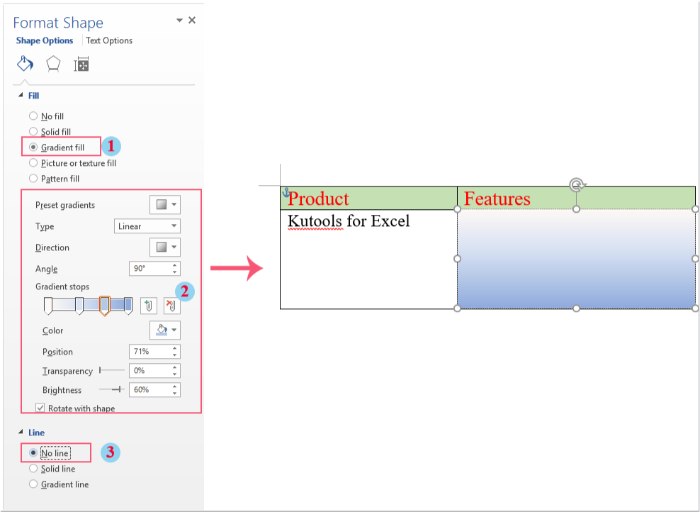
- Adjust Color and Options:
- In the “Format Shape” pane under the “Fill & Line” tab, choose the “Gradient fill” option.
- Set and adjust the gradient colors according to your preference. Check the “No line” option.
- Send Behind Text:
- Click on “Format” > “Send Backward” > “Send Behind Text.”

- Display Content:
- The content of the cell now has a gradient fill and will display as intended.
This method allows you to creatively apply gradient fill to cells in a Word table, adding a touch of innovation and style to your document.


