To apply or change a Word template to an existing Word document, follow these steps:
- Open the Word document to which you want to apply the template.
- Click on the “File” tab in the ribbon to open the Backstage view.
- Choose “Options” at the bottom of the left sidebar to open the Word Options dialog box.
- In the Word Options dialog box, select “Add-ins” from the left sidebar.
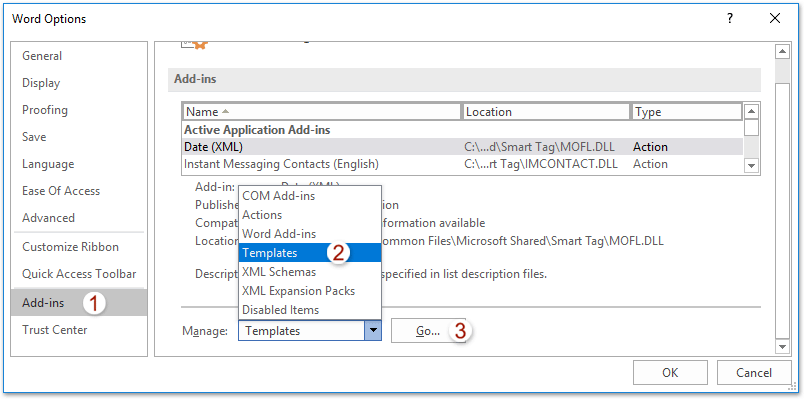
- From the “Manage” drop-down list at the bottom, choose “Templates” and click the “Go” button. This will open the Templates and Add-ins dialog box.
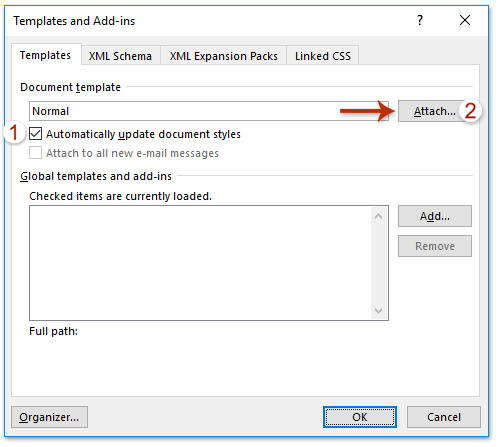
- In the Templates and Add-ins dialog box, check the “Automatically update document styles” option.
- Click the “Attach” button to open the Attach Template dialog box.

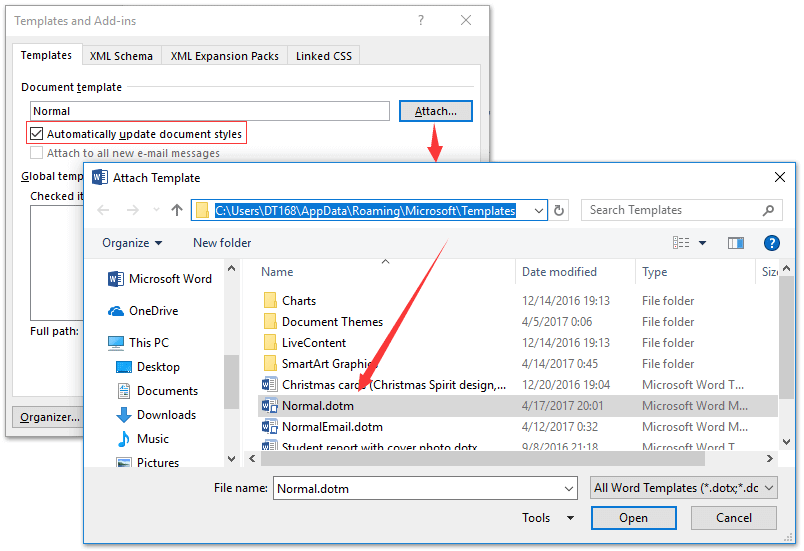
- Navigate to the folder where your Word template is located. Select the desired template and click the “Open” button.
-
How to Apply a Word Template to an Existing Word Document
Click “OK” in the Templates and Add-ins dialog box to apply the selected template to the document.
Now, the specified Word template is applied to the existing Word document. If you want to remove the template or apply a different one, you can follow the same steps and choose a different template in the Attach Template dialog box.
Please note that the default Word template can be found in the folder path: C:\Users\your_user_name\AppData\Roaming\Microsoft\Templates. You can use this template to revert to the original settings if needed.


