Creating a table of contents in a lengthy document can help you quickly navigate to the content you need. In this article, I will discuss how to insert a table of contents into a Word file quickly and easily.
Insert a table of contents into a Word document with the Table of Contents feature
To create a table of contents in a Word document, it is important to format the text you want to link in the table of contents as specific headings. Here’s how:
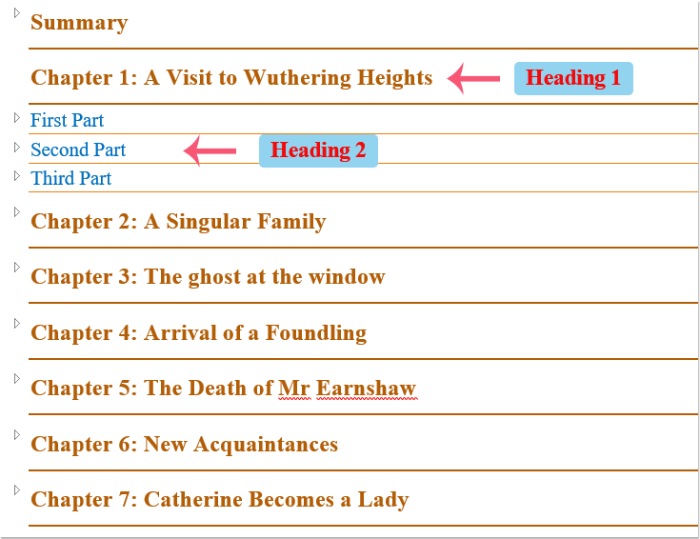
First, you should format the text you want to link in the table of contents as Heading 1, Heading 2, etc., as shown in the screenshot:

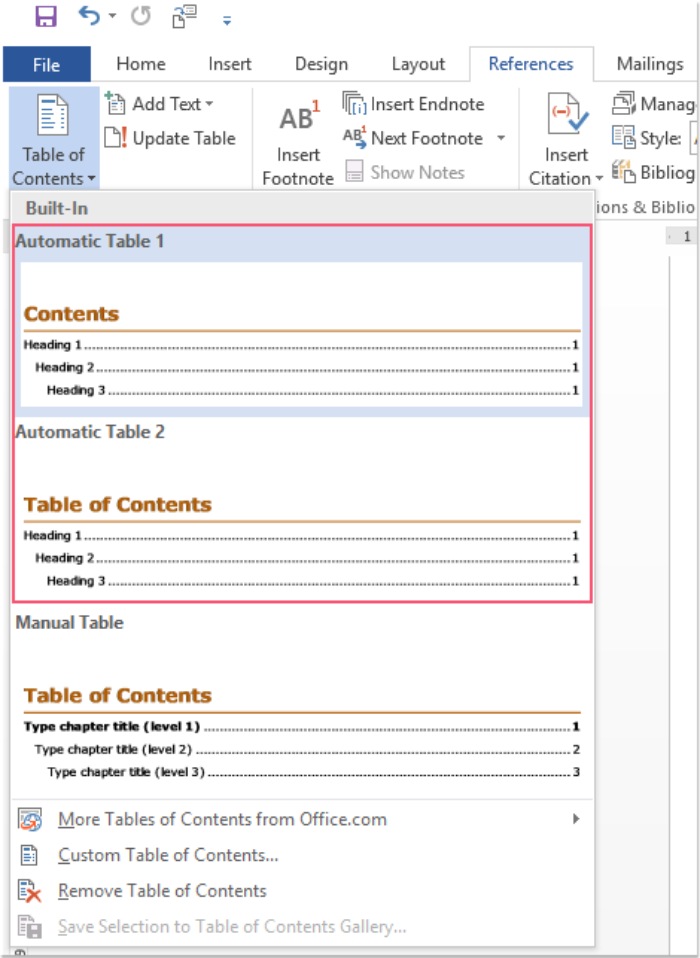
After setting the heading style for the text, please place the cursor at the beginning of the document, then click on References > Table of Contents, and select a table style from Table of Contents 1, as shown in the screenshot:
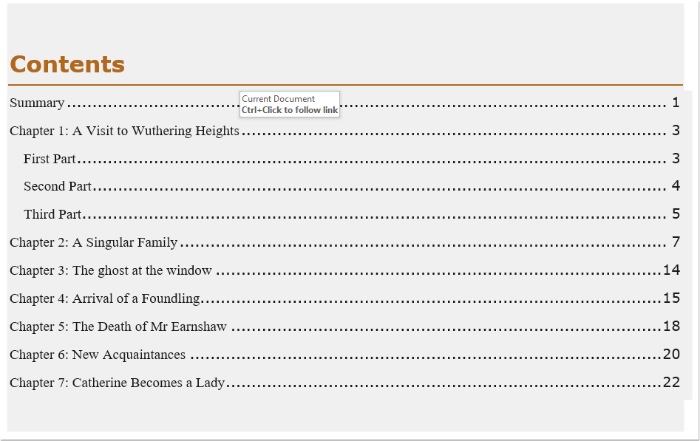
Now, the table of contents has been inserted into the document, and you can click on the linked text by holding the Ctrl key to go to that part of the document. See the screenshot:
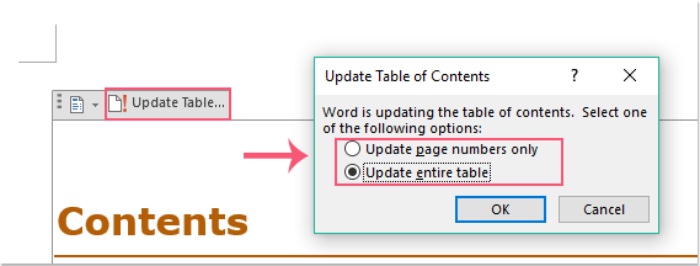
Note: If there are any changes in your document, you can update the table of contents by clicking on Update Table, and in the Update Table dialog box, select an option you need, as shown in the screenshot below:
How to quickly insert a table of contents into a Word document


