How to Insert a Watermark in Excel. A watermark, whether it’s a transparent image or text, sits subtly in the background of a document.
It serves several purposes, such as safeguarding the document by adding copyright details or indicating confidentiality, drafts, samples, or versions. Additionally, it can even function as a branding tool by incorporating a company logo. While Excel lacks a built-in watermark feature, users have various methods to add, format, replace, and remove watermarks using images and text within a spreadsheet.
How to Insert a Watermark in Excel
Here are simplified steps to easily add, format, replace, and delete watermarks in Excel.
Adding a Watermark as an Image Using Header & Footer
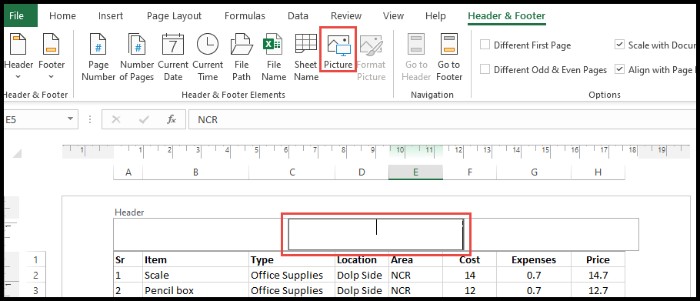
- Navigate to the “Insert” tab and click on the “Text” icon in the ribbon, selecting the “Header & Footer” option.

- Within the “Header & Footer Elements” group on the ribbon, click on the “Picture” icon.
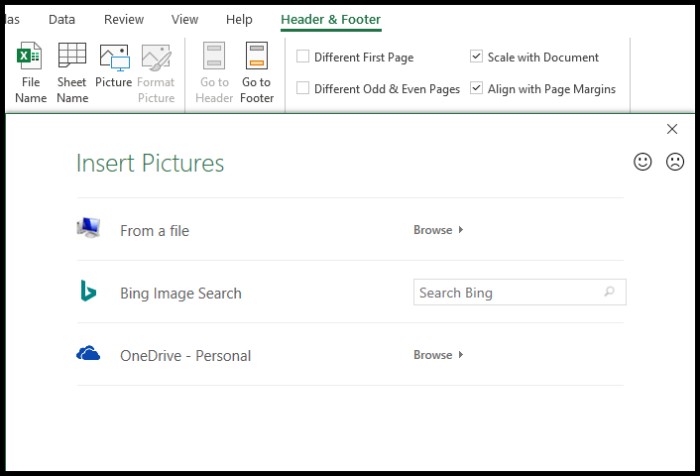
- Choose the desired image for the watermark from the “Insert Pictures” dialog box and click “Insert.”
- Initially, the image will appear as &[Picture] in the center header box, not immediately reflecting on the worksheet.

- To reposition the watermark, place the cursor before the &[Picture] code and press enter multiple times to shift its placement.

- Finally, click outside the header cell area, and your added image watermark should now be visible.