Securing Your Excel Workbook. There are instances when users desire to set their workbook to read-only mode as a precautionary measure against accidental or intentional data edits. This is particularly common when dealing with intricate formulas or calculations that users want to safeguard.
Securing Your Excel Workbook: Making It Read-Only
In this tutorial, we’ll explore various methods to set your default Excel workbook to read-only, offering you flexibility based on your preferences.
1. Using Save As: Securing Your Excel Workbook
a. Navigate to the “File” tab and select “Save As” to save the workbook in read-only mode.
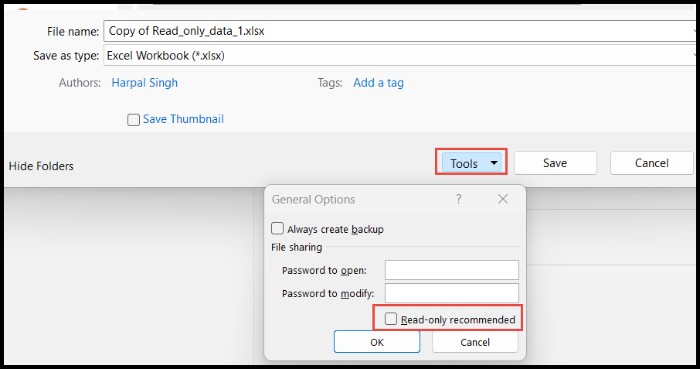
b. Choose the save location, click “Tools,” and then select “General Options” from the drop-down menu.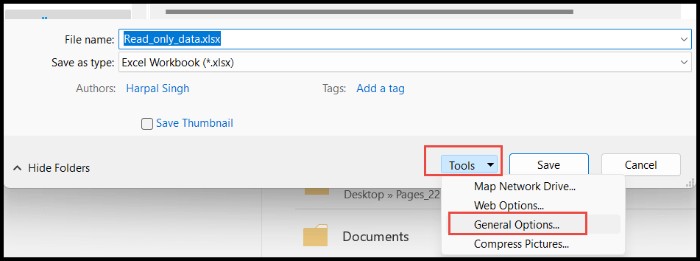
c. Set a password within the “Password to modify” field, select “Read-only recommended,” and click OK.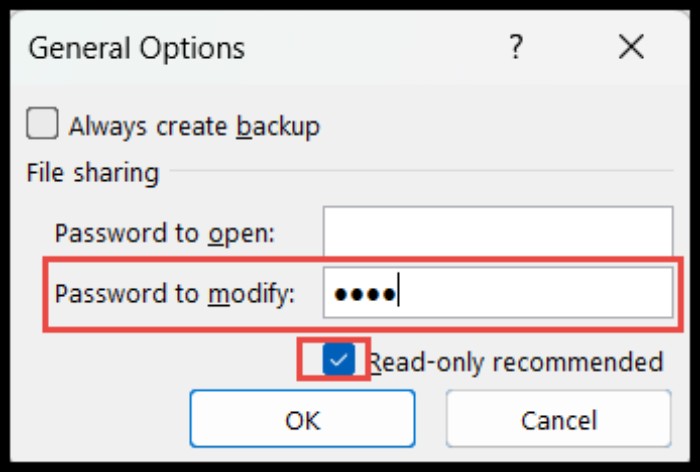
d. Leave the password field blank if you only want to recommend users open the file in read-only mode.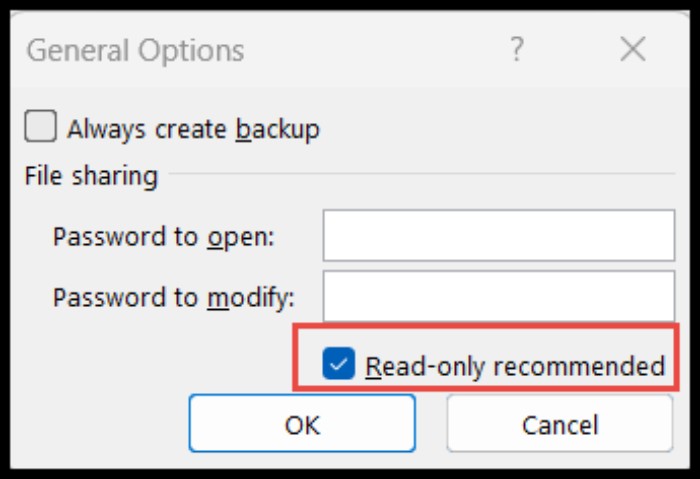
e. Users will be prompted to enter a password to open in edit mode or can choose “Read Only” for viewing only.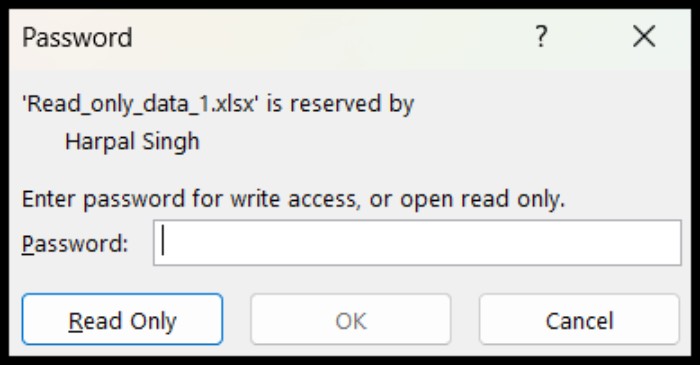
2. Using Info Option:
a. Go to the “File” tab and click on “Info,” then select “Protect Workbook,” and choose “Always Open Read Only.”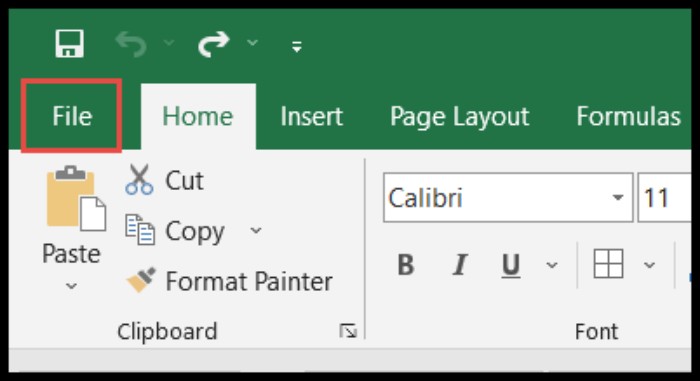
b. The default mode is now read-only, prompting users to open as requested or in editable mode.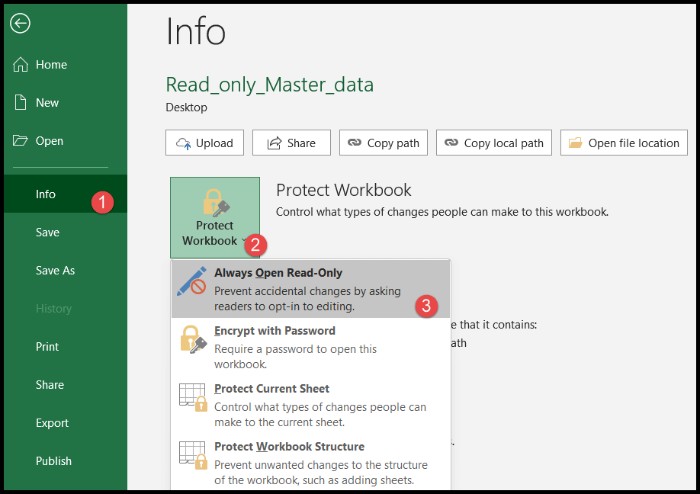
c. Click “Yes” to open in read-only mode or “No” to open in editable mode.
3. Using Toggle Read Only:
a. Click the “Arrow” sign in the “Quick Access Toolbar” and select “More Commands.”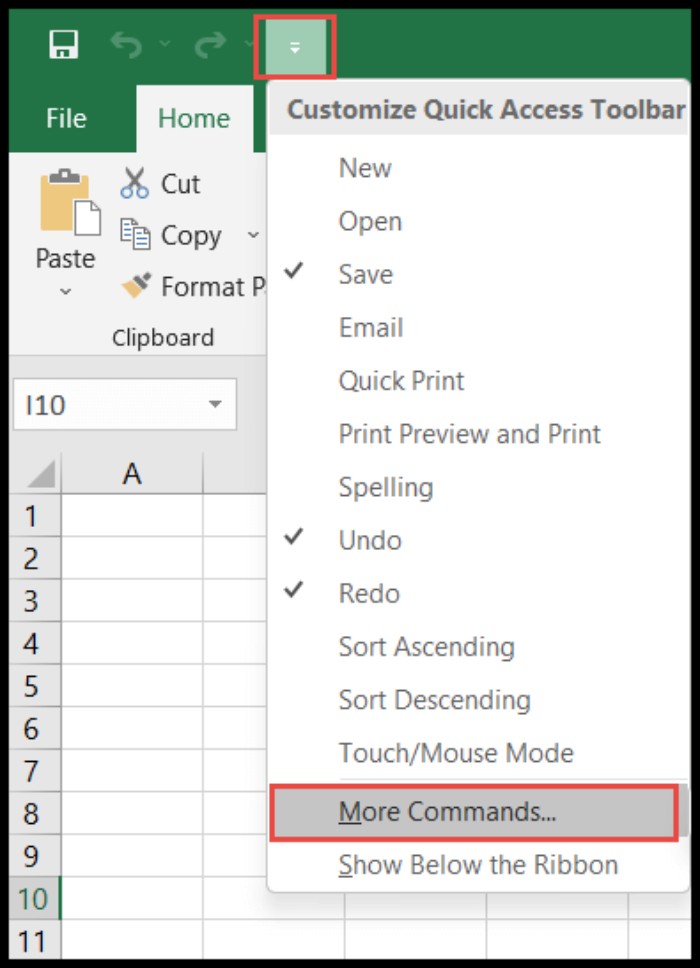
b. Choose “Commands Not in the Ribbon” and select “Toggle Read Only,” then click “Add.”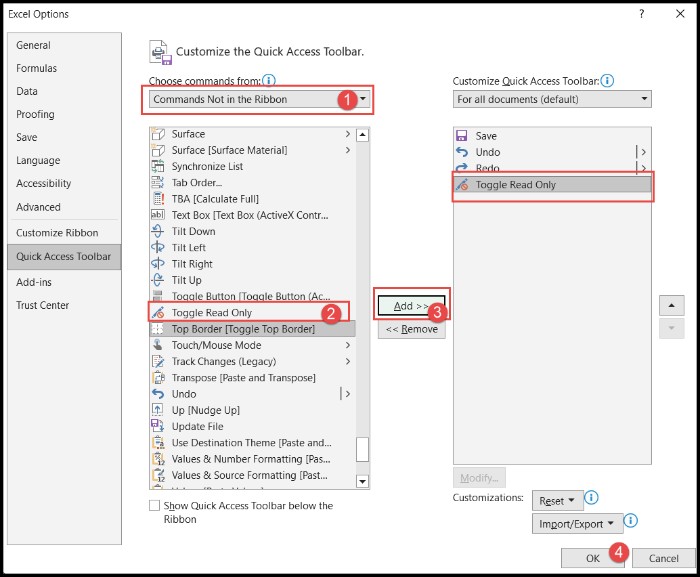
c. The “Toggle Read Only” button is added to the “Quick Access Toolbar.”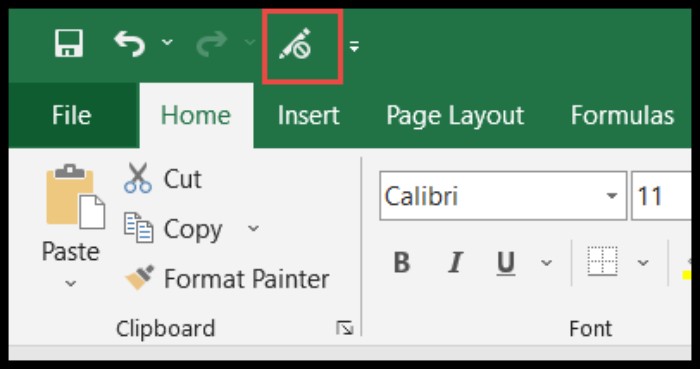
d. Click “Toggle Read Only” to switch between read-only and editable modes quickly.
Note: If changes are not saved, Excel will prompt you to save before enabling read-only mode.
Removing Read-Only Mode:
Securing Your Excel Workbook. To revert to an editable workbook, create a new copy using “Save As” and untick the “Read-only recommended” option in the “General Options” dialog box.