In today’s digital age, inserting images from a scanner or camera into a Word document is no longer a daunting task. However, with the changes in the interface and features of Word from version 2007 onwards, some users may encounter difficulties in performing this operation. In this article, we will explore simple methods to insert images from a scanner or camera into a Word document in Word 2007 and later versions.
Insert picture from scanner or camera in Word by using shortcuts:
If you’re using Word 2007 or Word 2010, you can access the “Insert Picture from Scanner or Camera” dialog quickly using keyboard shortcuts:
- Press the Alt key, then type the sequence “i p s” on your keyboard.
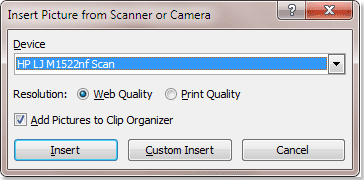
- This will display the “Insert Picture from Scanner or Camera” dialog, where you can choose a picture from your device.
Insert picture from scanner or camera in Word by creating a Macro:
- Create a Macro for your Word document: Click on View > Macros > View Macros.

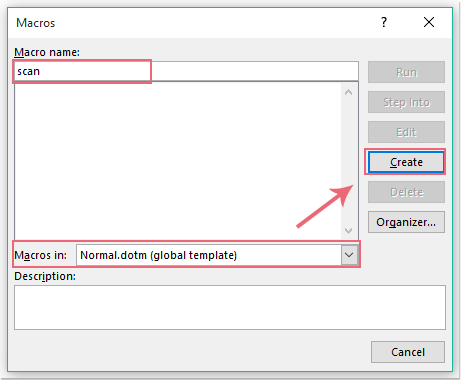
- In the Macros dialog, type “Scan” under Macro name, select “Normal.dotm (global template)” from the Macros in drop-down list, and click “Create.”

- In the Microsoft Visual Basic for Applications window, paste the provided VBA code between the “Sub scan” and “End sub” lines.
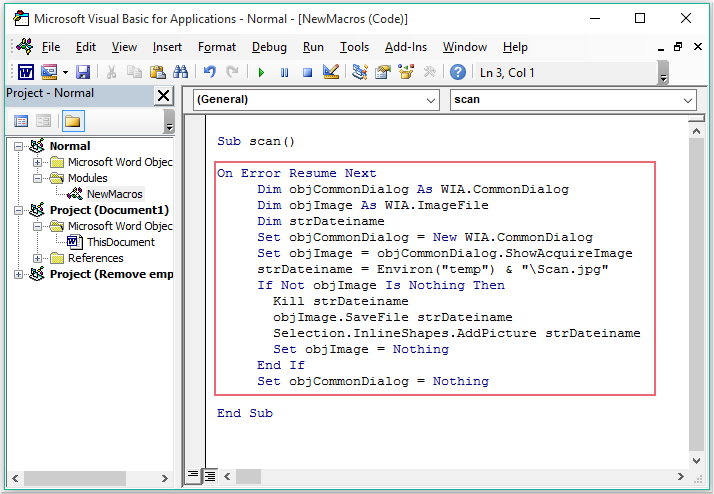
- Click on Tools > References, check the “Microsoft Windows Image Acquisition Library” option, and click OK.
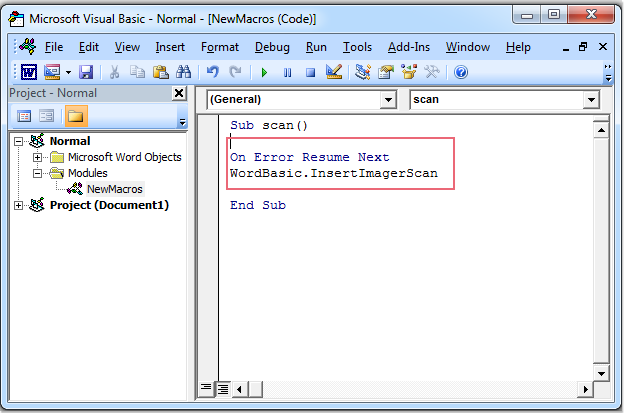
- Press F5 to run the code, ensuring the scanner is on and connected to the computer.
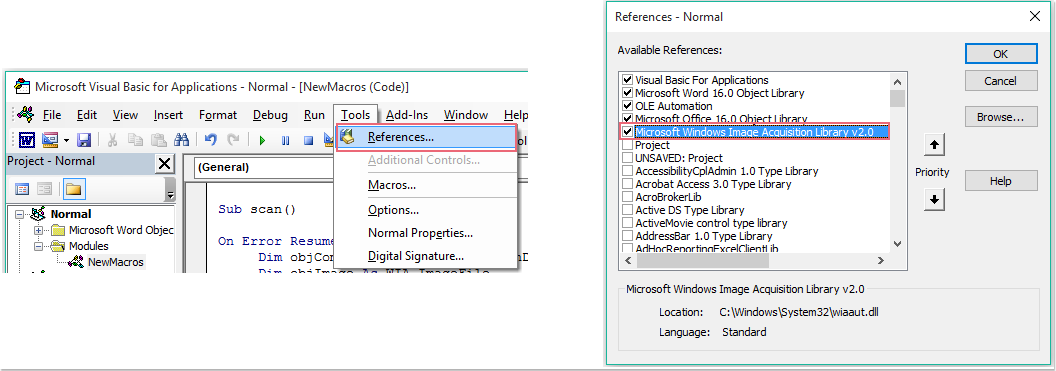
How to insert picture or image from scanner or camera in Word
While inserting images from a scanner or camera into a Word document may pose some challenges in newer versions of Word, with the methods outlined above, you can accomplish this task easily and quickly. Leveraging the features of Word as well as supplementary tools like Kutools for Word will help you streamline your workflow and save time in your daily tasks.


