Inserting multiple rows into a table in Word can indeed save time, and there are a couple of efficient methods to do so:
Insert Rows by Right Click
- Highlight the rows above which you want to insert new rows.

- Right-click within the highlighted area and select “Insert.”
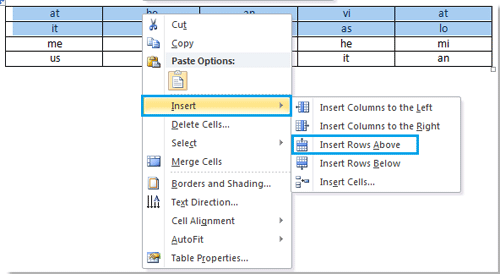
- Choose “Insert Rows Above” to insert new rows above the selected rows.


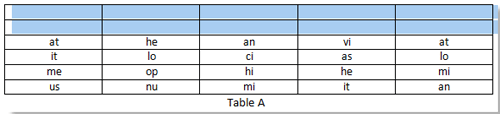
- Word will insert the specified number of rows above the selected ones.
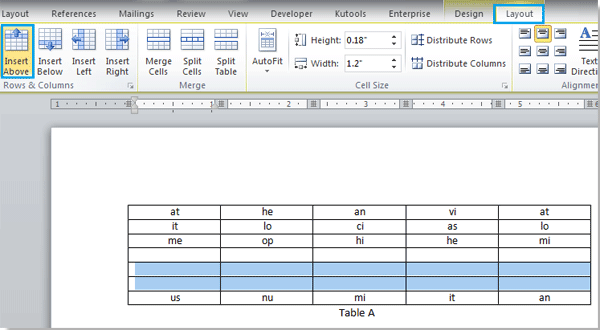
Insert Rows by Clicking Insert in Layout
- Select the rows above which you want to insert new rows.
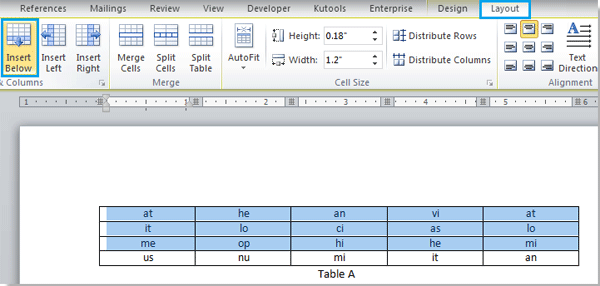
- Navigate to the Layout tab and click on “Insert Below” in the Rows and Columns group.

- Word will insert new rows below the selected rows.
- To insert more rows, repeat the process as needed.


How to insert multiple rows into a table in word
These methods allow for quick insertion of multiple rows into a table, streamlining your document editing process.
Note: You can also apply similar steps to insert multiple columns into a table. Additionally, if you only need to insert one row, you can simply place the cursor in the desired row and apply the insertion utility without selecting any rows.


