By default, a watermark is applied to all pages in a Word document. If you only wish to insert a watermark on certain pages in the Word document, the methods in this article will be helpful for you.
Custom Watermark on Certain Pages in a Word Document
If you only want to insert a custom watermark on certain pages instead of all pages in the Word document, please follow these steps:
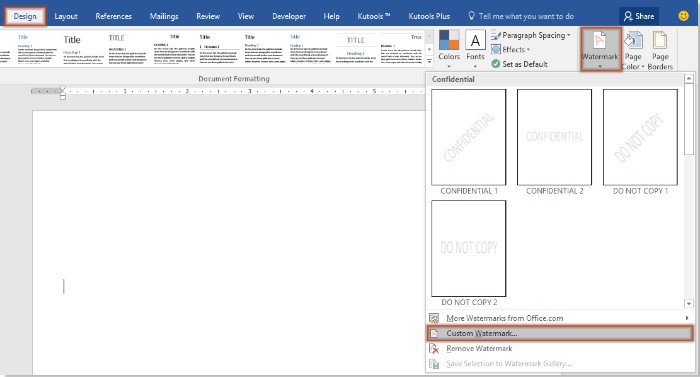
1. Firstly, you need to create the watermark you require and save it to the Watermark Library. Click on Design > Watermark > Custom Watermark. See the screenshot below:
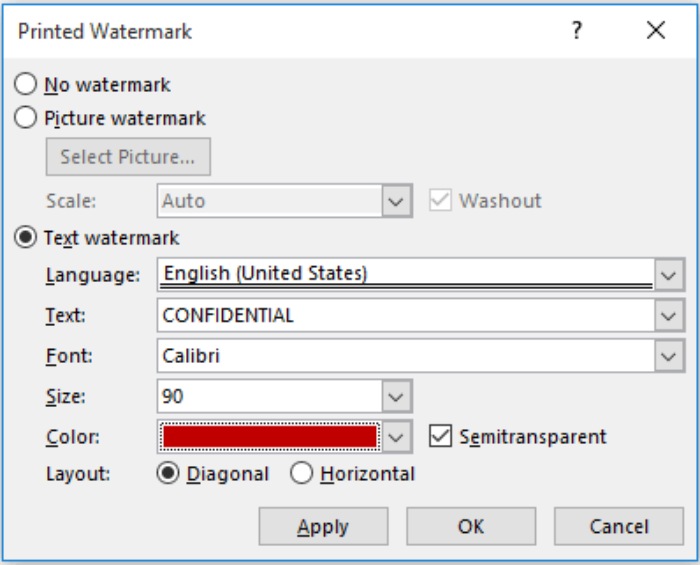
2. In the Printed Watermark dialog box, customize the watermark and click the OK button.
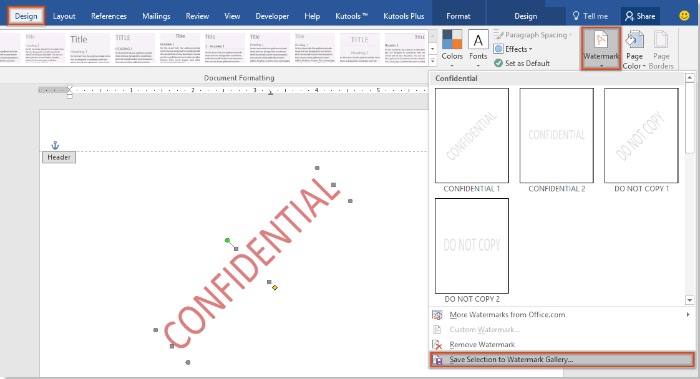
3. Double-click the document header to switch to header editing mode, then click to select the watermark on the page. See the screenshot below:

4. After selecting the watermark, click on Design > Watermark > Save Selection to Watermark Gallery. See the screenshot below:

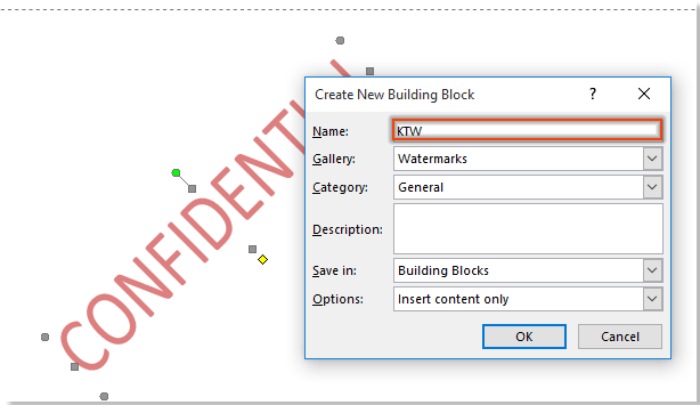
5. In the popped-up Create New Building Block dialog box, name this watermark and click the OK button.
6. Navigate to the Header & Footer Tools tab, click the Close Header and Footer button.

7. Now, you need to remove all the watermarks from the document by clicking on Design > Watermark > Remove Watermark.
8. Go to the document page where you want to apply the watermark, click on Design > Watermark, right-click on the watermark you saved, and select Insert at Current Document Position from the context menu. See the screenshot below:

How to Insert a Watermark on Certain Pages Instead of All Pages in a Word Document
The custom watermark will be inserted on the current page simultaneously.


